Forex Live Market Analysis 2010
Most Reliable Sport Betting Prediction
Make Huge Affiliate Commission with RSS Content
The art of making a Liverpool Flag/Banner.
Sounds a bit weird to have to tell people how to make a flag, but the amount of emails I get on it, and private messages, I just thought it best to clear it up once and for all and write the definitive explanation. May seem very detailed, but that's the part I get asked on most!!!
I've made a few flags so far with the lads I go the games with. The pictures below are of the main 2 that we have made in recent years.
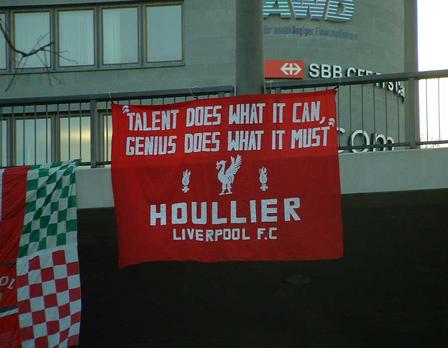
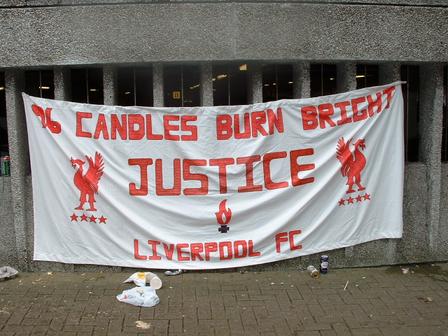 The top one is what I would call a "traditional football flag" in the sense that it is letters actually stitched onto a background sheet. The bottom one is purely marker pens on sheet. Very basic, quite easy, and cheap.
A Traditional stitched flag.
First thing is to think of what you would like to see on the flag. Do you want it about a player, manager, history, future or what? Personally, I've always tried to stick away from Manc/Blueshite Baiting because unless the motto/saying you have is absolutely superb [i.e. – Don't bomb Iraq – Nuke Manchester] then it just sounds like bitterness and jealousy. I've always thought we should leave that to them to do.
Once you've decided on what you're going to say on the banner, its time to think about any additional badges etc [such as a Liverbird, Eternal Flame or Euro Cups etc]. Get a rough idea in your head of what you want, and better still knock something up on Photoshop or on scrap paper. Just so you can see the layout of words, badges and spaces.
Next, decide on the size of the banner. This is something I wish I had done better with the Houllier one. that flag is 4 metres wide by 3 metres high, and has always been a big pain in the arse. It's too big to hang in grounds as it hinders the view of those below, and it's too big to hold up when you are standing cos most of it just rests on the floor. In hindsight, I wouldn't make a banner bigger than 3 metres wide and 2 metres high. Just makes it easier. Id possibly even say, ideally you want 2 metres by 1.5 metres. You could take that anywhere.
Once you have a size decided you need to go out and buy the materials. Over time I've built up a knowledge of where I need to go to get the best material to suit what I want, and I also have a seamstress that I use to save me from having to mess about with the stitching myself. Use Yellow pages, and get a material shop to make a decent banner, and get the material cut off the role. [obviously, you can use bed sheets and similar – ill come to that later] You need a background colour [most people go for red] and then materials for your letters, badges etc.
Next is possibly the most important thing of all. Measurements.
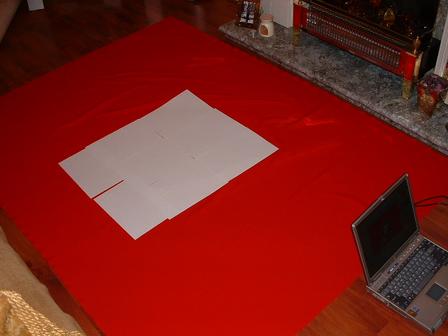
I like to lay the background material out on the floor and use sheets of paper to show where badges, and symbols will fit, so I know how much letter space I will roughly have. As shown in the pic below.
The top one is what I would call a "traditional football flag" in the sense that it is letters actually stitched onto a background sheet. The bottom one is purely marker pens on sheet. Very basic, quite easy, and cheap.
A Traditional stitched flag.
First thing is to think of what you would like to see on the flag. Do you want it about a player, manager, history, future or what? Personally, I've always tried to stick away from Manc/Blueshite Baiting because unless the motto/saying you have is absolutely superb [i.e. – Don't bomb Iraq – Nuke Manchester] then it just sounds like bitterness and jealousy. I've always thought we should leave that to them to do.
Once you've decided on what you're going to say on the banner, its time to think about any additional badges etc [such as a Liverbird, Eternal Flame or Euro Cups etc]. Get a rough idea in your head of what you want, and better still knock something up on Photoshop or on scrap paper. Just so you can see the layout of words, badges and spaces.
Next, decide on the size of the banner. This is something I wish I had done better with the Houllier one. that flag is 4 metres wide by 3 metres high, and has always been a big pain in the arse. It's too big to hang in grounds as it hinders the view of those below, and it's too big to hold up when you are standing cos most of it just rests on the floor. In hindsight, I wouldn't make a banner bigger than 3 metres wide and 2 metres high. Just makes it easier. Id possibly even say, ideally you want 2 metres by 1.5 metres. You could take that anywhere.
Once you have a size decided you need to go out and buy the materials. Over time I've built up a knowledge of where I need to go to get the best material to suit what I want, and I also have a seamstress that I use to save me from having to mess about with the stitching myself. Use Yellow pages, and get a material shop to make a decent banner, and get the material cut off the role. [obviously, you can use bed sheets and similar – ill come to that later] You need a background colour [most people go for red] and then materials for your letters, badges etc.
Next is possibly the most important thing of all. Measurements.
I like to lay the background material out on the floor and use sheets of paper to show where badges, and symbols will fit, so I know how much letter space I will roughly have. As shown in the pic below.
 It's important to get the measurement of your letters perfect to fit sound on the flag. Too big and yer goosed, too small and it will look crap. If you have background material that is 2.5 metres wide and 2 metres high, and you want to put the word "LIVERPOOL" across the flag, then you need to count the amount of letters and spaces [important] that are included. For "LIVERPOOL" it would be 9 letters and 8 spaces. So what I would do is delete the spaces 1st. Say 3cm per space [30mm] then I would decide how much space I would like either side of the word. Say 30cm [300mm]. so that the word is central. Then I know that 2.5metres [250cm] less the 2 x 30cm spaces is 190cm, and then less the 8 spaces is 166. That means you have 166cm to divide by the amount of letters. 166cm / 9 letters gives me near enough 18.5.
Each letter will be made 18.5cm wide.
It's important to get the measurement of your letters perfect to fit sound on the flag. Too big and yer goosed, too small and it will look crap. If you have background material that is 2.5 metres wide and 2 metres high, and you want to put the word "LIVERPOOL" across the flag, then you need to count the amount of letters and spaces [important] that are included. For "LIVERPOOL" it would be 9 letters and 8 spaces. So what I would do is delete the spaces 1st. Say 3cm per space [30mm] then I would decide how much space I would like either side of the word. Say 30cm [300mm]. so that the word is central. Then I know that 2.5metres [250cm] less the 2 x 30cm spaces is 190cm, and then less the 8 spaces is 166. That means you have 166cm to divide by the amount of letters. 166cm / 9 letters gives me near enough 18.5.
Each letter will be made 18.5cm wide.
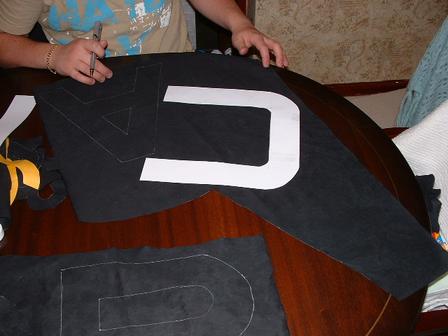
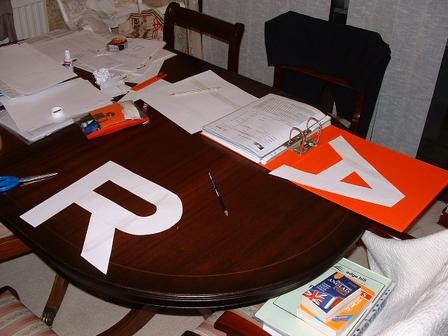 I would then get a sheet of A4, or if the letter was too wide for this, something else. I would just measure by eye what height looks right with the letter being 18.5cm wide. If I'm unable to fit the height and width of my letters onto a single sheet of A4, then I selotape a couple together. It's then a case of marking on these sheets the width and height I am working inside of. I then have to draw the letters using a ruler, to measure out exactly. This isn't really something I can explain; you just have to sit down and start to do it. See the picture below:

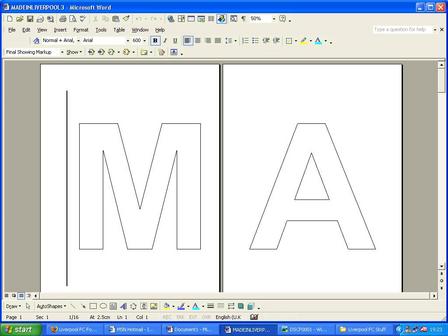
 More recently I have messed about on MS word on the PC to get letters to the right width, and then just printed them all out, and then cut round them so I can use them as stencils on the material. As shown in the picture below.
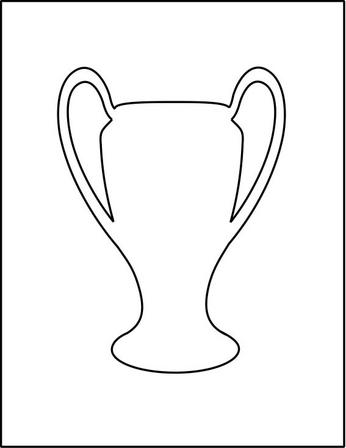
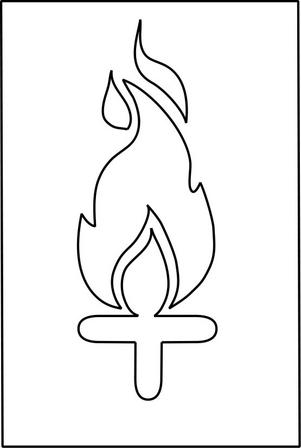
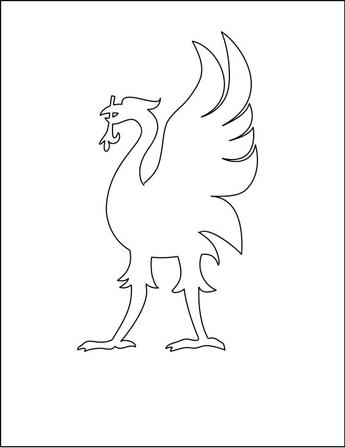
 Once I have the stencils for the letters cut out, its time for the pictures. I've got stencils saved on my PC [see pics below] and I can send these to people whenever.
 - Once this is all printed, and cut out....its time to start drawing this onto the material you bought for the letters. Whether it was one colour, or a few. Draw round the paper stencils you now have, and once this is done cut out the letters/badges from the material. It sounds long and laborious [and I guess it can be] but if you get a couple of you on it. It's a couple of hours depending on what you are putting on the flag.
- Once they are all cut out, go and lay them onto the background material. This is the 1st point when you will get the effect of the flag, and all the time and effort now seems worth it. Lay it all out, make sure your measurements were all right. You don't wanna start sticking them on, incase you get to the other side of the flag and realise you've fucked up with the measuring.
- If I'm stitching letters on, then I tend to use "Bondaweb" or "wonderweb"...you can buy the later from most places [Asda, Tesco's etc – it's the stuff on rolls used by yer ma when you were young to turn yer long kecks up!!] Bondaweb is something you need to get from a proper material shop, and is slightly more expensive [at approx £1 per foot] but is better. Although both work ok.
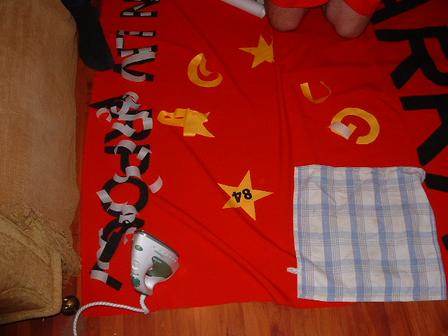
- Lay all the letters out, with the bondaweb onto, and stick them one by one. As shown on the photo below. Just take yer time with it, and REMEMBER to put a towel underneath just to be sure
- Once this is all printed, and cut out....its time to start drawing this onto the material you bought for the letters. Whether it was one colour, or a few. Draw round the paper stencils you now have, and once this is done cut out the letters/badges from the material. It sounds long and laborious [and I guess it can be] but if you get a couple of you on it. It's a couple of hours depending on what you are putting on the flag.
- Once they are all cut out, go and lay them onto the background material. This is the 1st point when you will get the effect of the flag, and all the time and effort now seems worth it. Lay it all out, make sure your measurements were all right. You don't wanna start sticking them on, incase you get to the other side of the flag and realise you've fucked up with the measuring.
- If I'm stitching letters on, then I tend to use "Bondaweb" or "wonderweb"...you can buy the later from most places [Asda, Tesco's etc – it's the stuff on rolls used by yer ma when you were young to turn yer long kecks up!!] Bondaweb is something you need to get from a proper material shop, and is slightly more expensive [at approx £1 per foot] but is better. Although both work ok.
- Lay all the letters out, with the bondaweb onto, and stick them one by one. As shown on the photo below. Just take yer time with it, and REMEMBER to put a towel underneath just to be sure 
 .
.
 - Once it's all stuck on, stand back and admire. It's now ready for the final stages.
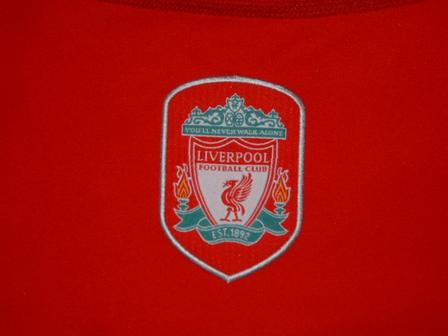
- Personally, unless you are competent, I wouldn't try to do me own stitching? Otherwise all your effort can go out the window. Look in the Yellow pages for a "seamstress" or "dressmakers" and call them to see if they will do it. For my Houllier one I paid £25 for it to be stitched, for the Carra one its cost £20. [less letters]. Ask for the stitching to be "Over locking" this give it a sort of outline effect once it's done. Like on the outside of the club badge on the kit. [see below]
- Once it's all stuck on, stand back and admire. It's now ready for the final stages.
- Personally, unless you are competent, I wouldn't try to do me own stitching? Otherwise all your effort can go out the window. Look in the Yellow pages for a "seamstress" or "dressmakers" and call them to see if they will do it. For my Houllier one I paid £25 for it to be stitched, for the Carra one its cost £20. [less letters]. Ask for the stitching to be "Over locking" this give it a sort of outline effect once it's done. Like on the outside of the club badge on the kit. [see below]
 Well worth it.
It may seem very long winded, and people say "ahhh fuck it, ill just spray it" but if you want it too look sound, and you can be proud of yer efforts, then it's worth it. A quick spray can/paint job can be just as effective, but most crews have a decent stitched one these days as well. The quality will depend on the effort put in. The Houllier one took approx:
20 mins planning.
2/3 hours making stencils [didn't think of using PC then]
8-10 hours drawing them on, and cutting out.
2 Hours sticking onto the background.
It cost [material wise]:
£3 for the Red background
£2 for the white material for the letters
£20 to be stitched.
The New Carra flag took about 6 hours in total to make [cos we used PC], and has cost a total of £30.
The painted/sprayed flag.
The Justice Flag was something that we thought up 3 days before the Worthy cup final with Man Utd. We didn't have time to get the material or for the lady to sew it all together so we have to draw it on.
Just followed the basic principles above, and made stencils that we drew on with pencil and then coloured with basic permanent marker pens from Partners. We did go through about 3 black, and 10 Red pens to do it.
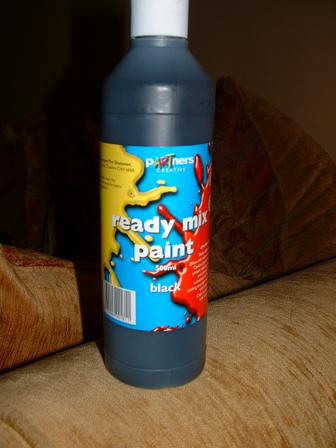
If you are gonna use paint, I'd use paints from Partners at £1.49 a pop [see pic below]. The stuff that kids use in school that has a very thick mixture but allows you to add water if you want it thinner. Just use it neat!
Well worth it.
It may seem very long winded, and people say "ahhh fuck it, ill just spray it" but if you want it too look sound, and you can be proud of yer efforts, then it's worth it. A quick spray can/paint job can be just as effective, but most crews have a decent stitched one these days as well. The quality will depend on the effort put in. The Houllier one took approx:
20 mins planning.
2/3 hours making stencils [didn't think of using PC then]
8-10 hours drawing them on, and cutting out.
2 Hours sticking onto the background.
It cost [material wise]:
£3 for the Red background
£2 for the white material for the letters
£20 to be stitched.
The New Carra flag took about 6 hours in total to make [cos we used PC], and has cost a total of £30.
The painted/sprayed flag.
The Justice Flag was something that we thought up 3 days before the Worthy cup final with Man Utd. We didn't have time to get the material or for the lady to sew it all together so we have to draw it on.
Just followed the basic principles above, and made stencils that we drew on with pencil and then coloured with basic permanent marker pens from Partners. We did go through about 3 black, and 10 Red pens to do it.
If you are gonna use paint, I'd use paints from Partners at £1.49 a pop [see pic below]. The stuff that kids use in school that has a very thick mixture but allows you to add water if you want it thinner. Just use it neat!
 Happy Flag Makin'
  by Roper
The top one is what I would call a "traditional football flag" in the sense that it is letters actually stitched onto a background sheet. The bottom one is purely marker pens on sheet. Very basic, quite easy, and cheap.
A Traditional stitched flag.
First thing is to think of what you would like to see on the flag. Do you want it about a player, manager, history, future or what? Personally, I've always tried to stick away from Manc/Blueshite Baiting because unless the motto/saying you have is absolutely superb [i.e. – Don't bomb Iraq – Nuke Manchester] then it just sounds like bitterness and jealousy. I've always thought we should leave that to them to do.
Once you've decided on what you're going to say on the banner, its time to think about any additional badges etc [such as a Liverbird, Eternal Flame or Euro Cups etc]. Get a rough idea in your head of what you want, and better still knock something up on Photoshop or on scrap paper. Just so you can see the layout of words, badges and spaces.
Next, decide on the size of the banner. This is something I wish I had done better with the Houllier one. that flag is 4 metres wide by 3 metres high, and has always been a big pain in the arse. It's too big to hang in grounds as it hinders the view of those below, and it's too big to hold up when you are standing cos most of it just rests on the floor. In hindsight, I wouldn't make a banner bigger than 3 metres wide and 2 metres high. Just makes it easier. Id possibly even say, ideally you want 2 metres by 1.5 metres. You could take that anywhere.
Once you have a size decided you need to go out and buy the materials. Over time I've built up a knowledge of where I need to go to get the best material to suit what I want, and I also have a seamstress that I use to save me from having to mess about with the stitching myself. Use Yellow pages, and get a material shop to make a decent banner, and get the material cut off the role. [obviously, you can use bed sheets and similar – ill come to that later] You need a background colour [most people go for red] and then materials for your letters, badges etc.
Next is possibly the most important thing of all. Measurements.
I like to lay the background material out on the floor and use sheets of paper to show where badges, and symbols will fit, so I know how much letter space I will roughly have. As shown in the pic below.
It's important to get the measurement of your letters perfect to fit sound on the flag. Too big and yer goosed, too small and it will look crap. If you have background material that is 2.5 metres wide and 2 metres high, and you want to put the word "LIVERPOOL" across the flag, then you need to count the amount of letters and spaces [important] that are included. For "LIVERPOOL" it would be 9 letters and 8 spaces. So what I would do is delete the spaces 1st. Say 3cm per space [30mm] then I would decide how much space I would like either side of the word. Say 30cm [300mm]. so that the word is central. Then I know that 2.5metres [250cm] less the 2 x 30cm spaces is 190cm, and then less the 8 spaces is 166. That means you have 166cm to divide by the amount of letters. 166cm / 9 letters gives me near enough 18.5.
Each letter will be made 18.5cm wide.
I would then get a sheet of A4, or if the letter was too wide for this, something else. I would just measure by eye what height looks right with the letter being 18.5cm wide. If I'm unable to fit the height and width of my letters onto a single sheet of A4, then I selotape a couple together. It's then a case of marking on these sheets the width and height I am working inside of. I then have to draw the letters using a ruler, to measure out exactly. This isn't really something I can explain; you just have to sit down and start to do it. See the picture below:
More recently I have messed about on MS word on the PC to get letters to the right width, and then just printed them all out, and then cut round them so I can use them as stencils on the material. As shown in the picture below.
Once I have the stencils for the letters cut out, its time for the pictures. I've got stencils saved on my PC [see pics below] and I can send these to people whenever.
- Once this is all printed, and cut out....its time to start drawing this onto the material you bought for the letters. Whether it was one colour, or a few. Draw round the paper stencils you now have, and once this is done cut out the letters/badges from the material. It sounds long and laborious [and I guess it can be] but if you get a couple of you on it. It's a couple of hours depending on what you are putting on the flag.
- Once they are all cut out, go and lay them onto the background material. This is the 1st point when you will get the effect of the flag, and all the time and effort now seems worth it. Lay it all out, make sure your measurements were all right. You don't wanna start sticking them on, incase you get to the other side of the flag and realise you've fucked up with the measuring.
- If I'm stitching letters on, then I tend to use "Bondaweb" or "wonderweb"...you can buy the later from most places [Asda, Tesco's etc – it's the stuff on rolls used by yer ma when you were young to turn yer long kecks up!!] Bondaweb is something you need to get from a proper material shop, and is slightly more expensive [at approx £1 per foot] but is better. Although both work ok.
- Lay all the letters out, with the bondaweb onto, and stick them one by one. As shown on the photo below. Just take yer time with it, and REMEMBER to put a towel underneath just to be sure .
- Once it's all stuck on, stand back and admire. It's now ready for the final stages.
- Personally, unless you are competent, I wouldn't try to do me own stitching? Otherwise all your effort can go out the window. Look in the Yellow pages for a "seamstress" or "dressmakers" and call them to see if they will do it. For my Houllier one I paid £25 for it to be stitched, for the Carra one its cost £20. [less letters]. Ask for the stitching to be "Over locking" this give it a sort of outline effect once it's done. Like on the outside of the club badge on the kit. [see below]
Well worth it.
It may seem very long winded, and people say "ahhh fuck it, ill just spray it" but if you want it too look sound, and you can be proud of yer efforts, then it's worth it. A quick spray can/paint job can be just as effective, but most crews have a decent stitched one these days as well. The quality will depend on the effort put in. The Houllier one took approx:
20 mins planning.
2/3 hours making stencils [didn't think of using PC then]
8-10 hours drawing them on, and cutting out.
2 Hours sticking onto the background.
It cost [material wise]:
£3 for the Red background
£2 for the white material for the letters
£20 to be stitched.
The New Carra flag took about 6 hours in total to make [cos we used PC], and has cost a total of £30.
The painted/sprayed flag.
The Justice Flag was something that we thought up 3 days before the Worthy cup final with Man Utd. We didn't have time to get the material or for the lady to sew it all together so we have to draw it on.
Just followed the basic principles above, and made stencils that we drew on with pencil and then coloured with basic permanent marker pens from Partners. We did go through about 3 black, and 10 Red pens to do it.
If you are gonna use paint, I'd use paints from Partners at £1.49 a pop [see pic below]. The stuff that kids use in school that has a very thick mixture but allows you to add water if you want it thinner. Just use it neat!
Happy Flag Makin'
by Roper

0 Responses to “Flag Making Explained!”
Post a Comment